User Tools
−Table of Contents
Clipboards
Keyboard Maestro supports several different types of clipboards
- System Clipboard — the standard Mac OS X Clipboard used by all Mac apps
- The alternate name “Current Clipboard” is used in some Macro Actions
- Named Clipboards — Copy of System Clipboard, or other Named Clipboard, created by user for future use
- There is usually a default Named Clipboard named “Default Clipboard”, do not confuse this with the Mac’s System Clipboard.
- Past Clipboards — Prior Versions of the System Clipboard stored in the Keyboard Maestro Clipboard_History
- Trigger Clipboard — The clipboard referenced by a Clipboard Filter menu selection (or the System Clipboard otherwise).
System Clipboard
The System Clipboard is the clipboard that you will use and work with the most.
Actions That Use The Clipboard
⚠️ Keep in mind that the System Clipboard is involved in all operations (Actions) that transfer data between the user interface (documents, menus, web pages,etc) and Keyboard Maestro.
For example, all of these Actions go through and will change the System Clipboard:
- and many others
Pause Until Clipboard Changes
Sometimes you will need to wait until the app has completed setting the Clipboard. You can use the CLIPBOARDSEED, in a calculation (CBSeedBefore ≠ CLIPBOARDSEED()) condition in the Pause Until Action to achieve this. Of course you will need to set the Keyboard Maestro Variable CBSeedBefore in an Action before the Action to set the Clipboard.
Discussion
The System Clipboard is a complicated entity, and often contains many different flavors of the same data last copied from an app. To better understand how Keyboard Maestro processes the System Clipboard, see this Forum post by @PeterNLewis. In particular, this post deals with getting plain text from the System Clipboard.
Clipboard History
Description
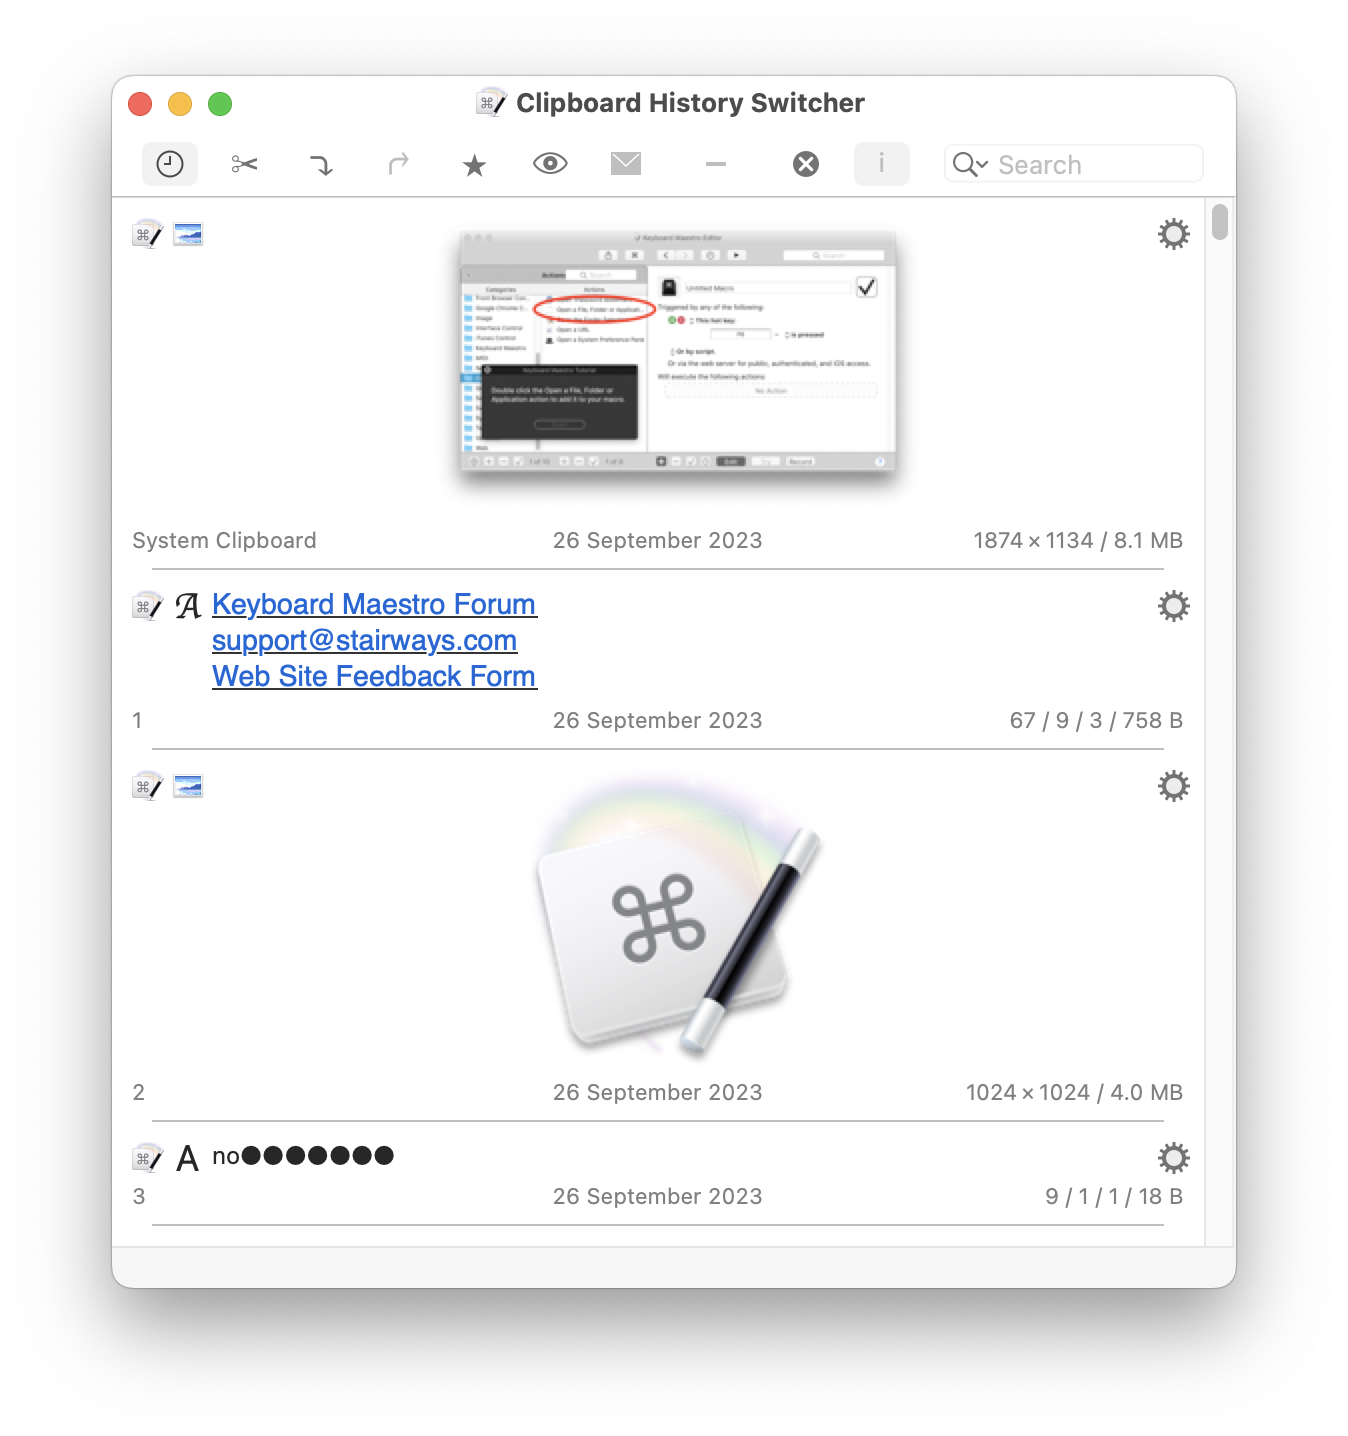
The Clipboard History keeps version history of the last two hundred times you have copied something to the System Clipboard. You can then paste any previous system clipboard by triggering the Clipboard History Switcher macro. This is a very powerful and useful feature.
Options
If you enable the Save Clipboard History to Disk preference in the Keyboard Maestro General preferences, the clipboard history will be saved and restored when Keyboard Maestro Engine is quit and relaunched (such as when you restart or upgrade). Otherwise it will be reset each time you quit the Keyboard Maestro Engine.
Display History
The Clipboard History Switcher is a built-in Macro, which you can find in the Keyboard Maestro editor, in the Switcher Group in the Macro Groups.
To trigger the Clipboard History Switcher, press the default hotkey of ⌘⌃⇧V (or a hot key of your choosing).

You can also use the Clipboard_History within the For Each action.
For more info, see Clipboard History Switcher documentation.
Paste from History
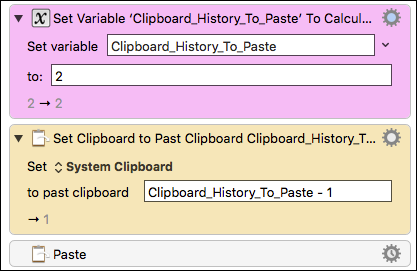
There is no one built-in Macro or Action that will paste from the Clipboard History, but you can easily do this by making use of the Set_Clipboard_to_Past_Clipboard Action.
For example, to paste from the 2nd item on the Clipboard History (where the latest, most recent item is #1), you can use these three Actions in a macro:

For more discussion on this, see this Keyboard Maestro Forum post .
Named Clipboards
A Named Clipboard is not a true clipboard like the Mac’s System Clipboard. Rather it is simply a means to permanently store (like a file does) clipboard contents (like images or styled text) that can later be used to place on the System Clipboard.
Purpose
- Store a copy of another Clipboard (System or Named) that will persist, even across your Mac restarts, until you either change it or delete it.
- Make changes to a Named Clipboard using Actions like Apply_Style_to_Clipboard.
- Store styled text, images, etc that cannot be stored in a Keyboard Maestro Variable (which stores only plain text)
Example Use of Named Clipboards
- Storing styled text and/or images for future use, like a styled email signature or logos.
- Saving the current System Clipboard for future use
- To restore at end of your Macro.
- To use in other Macros.
⚠️ Note that Keyboard Maestro provides a named clipboard with the name of “Default Clipboard”. It is nothing special, and acts like any other named clipboard. The “Default” in the name means nothing more than that it was provided by default. Do not mistake this for the System Clipboard.
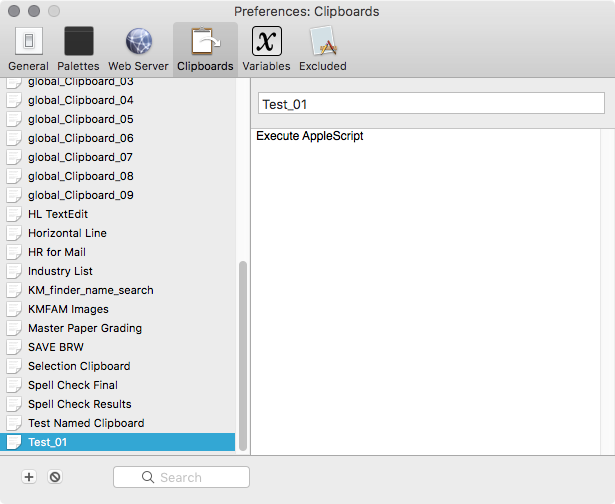
Named Clipboards are located in the Keyboard Maestro Preferences in their own “Clipboards” panel.
Use the [+] button to create a new named clipboard.
The one-line field at the top-right is the name field.
The big field on the lower-right is the content field.
You can add plain text, styled text, and images simply by pasting into the content field, but if you want to add something like a Keyboard Maestro action you need to use a Copy to Named Clipboard action to get it in there.
Trigger Clipboard
The Trigger Clipboard is not a clipboard per se, instead it is a reference to a selected clipboard. Usually it will be the selected clipboard in the Clipboard History Switcher or Named Clipboard Switcher window that you wish to act on with a Clipboard Filter. It will be either a past clipboard in the Clipboard History Switcher, or a Named Clipboard in the Named Clipboard Switcher, or if none of them are selected it will refer to the System Clipboard.
For example, if you are viewing the Clipboard History Switcher, and select the third last clipboard entry and then choose a Clipboard Filter from the Gear menu, the Trigger Clipboard will refer to the selected clipboard.
Clipboard Actions
There are a variety of actions for accessing or processing the clipboard. These allow you to build macros that operate on the clipboard.
Actions That Directly Use Clipboards
- System Clipboard
- Delete Current or Past Clipboard in the history of the System Clipboard
- All Clipboards
- Named Clipboards
For more info, see Clipboard Actions documentation.
Clipboard Tokens
In addition to the above Actions that use Clipboards, there are several Clipboard Tokens that can be used in any Action which has a field for Clipboards, Variables, or text.
These Include:
- %CurrentClipboard% (same as System Clipboard)
Clipboard Condition
The Clipboard Condition may be used with Macro Actions like IF/THEN to branch control based on criteria concerning the data on the Clipboard. For details see: Clipboard Condition
See Also
Actions
Functions
- CLIPBOARDSEED – used to determine when Clipboard has changed
Triggers
- Clipboard Filter trigger

